1. What file formats do you need?
When you design your laser cutting project you need to prepare a vector file. A vector file is a mathematical formula that allows for the resizing of the design without any quality loss. An image (jpg or png) is built of pixels and will lose quality when resized. A vector file won’t and that’s the main benefit of it.
A laser cutter will read the vector file as paths to cut or engrave. The machine can not read a jpg or png. The most popular vector file format is svg, there are also others such as .ai, or pdf.
2. Which software should you choose?
You can use two types of software for laser cutting: 2D or 3D. 2D software is convenient for graphic designers to produce logos or banners. You will only work with flat objects. But you’re not only limited to that. Three-dimensional software might be beneficial for mechanical and engineering projects.
2D software:
- Adobe Illustrator: the most popular vector design software
- CorelDRAW: intuitive and simple to use graphic design software
- AutoCAD: highly professional software dedicated to engineers and architects
- Inkscape: the only fully free and open-source graphic design software
3D software:
- Solidworks: engineering-grade CAD software with packages of tools dedicated to specific industries
- Autodesk Inventor: mechanical 3D modeling software for creation and optimization of designed systems
- Autodesk Fusion: powerful, but user-friendly CAD software with tools for prototyping and engineering the manufacturing of the part
- FreeCAD: free and open-source mechanical engineering software
3. Pick the right material
Choosing the right material is absolutely crucial when it comes to laser cutting. Ask yourself a question: what is the purpose of my project? In what conditions will it be used? Your design might require withstanding a lot of stress, then MDF material will be suitable. For better flexibility and waterproof characteristics, Acrylic will be advised. When it comes to the most affordable material, solely for presentation projects, Cardboard will probably be enough. Check out our laser cutting materials to get more information.
4. Choose appropriate material thickness
Deciding on the material is one thing, but its thickness is a different story. Depending on how detailed is your design and if you plan to engrave, the thickness of the material will play an important role. Thicknesses can go from 1 to 10 mm.
If your laser cutting design involves engraving, you don’t want to pick the thinnest material available as the laser can cut through. Additionally, if your material is very thin, the laser might melt it if it’s too detailed. However, if your project requires some flexibility, you should adjust your design to thin material.
5. Remember the kerf
The kerf is a small amount of material which evaporates when the laser cuts through it creating a gap. Not only laser cutting but many other machines have kerf, for instance, a blade cutting wood, as the blade has a thickness. The laser beam also has a thickness, which therefore leaves a kerf when it burns the material out.
Kerf is especially important to consider when you design assemblies. If one piece needs to fit within another, you need to add half of the kerf to the inner object and subtract the other half of the kerf from the outer part.
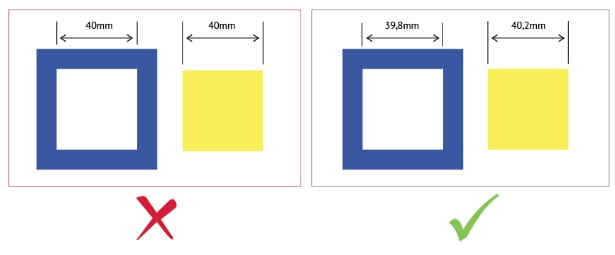
6. Minimum distance between cutting lines
Another important aspect you need to think of when it comes to Laser Cutting design is the minimum space between two cutting lines. If two lines will be too close, the laser beam will melt the material or can even cause fire The minimum distance is related to the thickness of the material.
Additionally, another risk is that even though the laser will do a fine job the material will break as there will be too much stress put on a thin detail. The minimum distance between two cutting paths varies depending on the material, so make sure you check the laser cutting guidelines.
7. The devil lies in the detail
As mentioned above you already have to think carefully about material thickness, kerf, and the minimum distance between cutting lines. Those three factors have a great effect on the details you can achieve with laser cutting technologies. The thinner the material, the greater the detail you can successfully reach. This applies to more decorative projects, as the finished product might not be as strong for mechanical purposes.
8. Assembly essentials
Laser Cutting technology allows for really amazing design solutions such as assemblies. As we already said, you have to take into consideration kerf. There are several design solutions when it comes to creating assemblies.
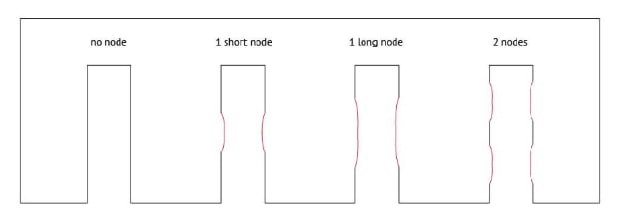
If you plan to connect your laser cut parts like puzzles, we recommend you to add nodes. Nodes are small bumps that allow for better friction between the connecting pieces and they move the stress of connecting two parts instead of it being focused on the slot’s whole surface.
- Edit the end of the slots
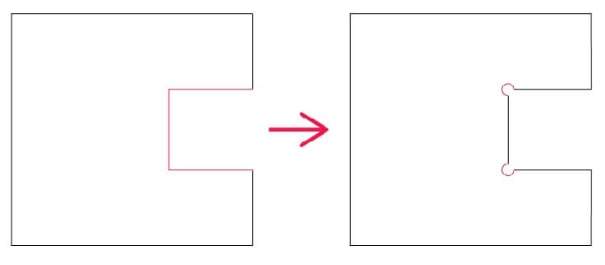
Sharp edges are not the best solution to connect parts, especially on the corners of the slots. They create weak points and can break easier. It’s smart to add a hole at the corner of each sharp angle. It allows the stress to be distributed across the hole instead of at one point of the edge.
9. Master the engraving techniques
Engraving can highly enrich your design. It can bring a new, visual effect to your design and open creative solutions. Engraving is fast, reliable and permanent, it will certainly improve your production. There are 3 main engraving methods:
- Line engraving
- Light surface engraving
- Deep surface engraving
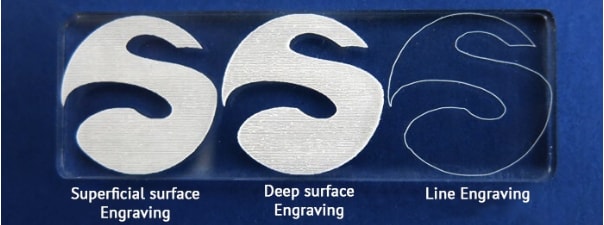
When you design for laser engraving, it is best to preset the engraving styles in your vector software. All you have to do is assign a color to a laser engraving option. For example, let’s say you would like to laser cut an ellipse (black line), light engrave your company’s description and logo (color green), and deep engrave your company’s logo (color red).
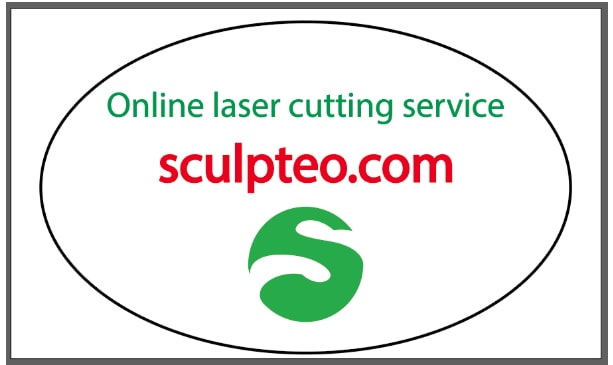
If you assign different colors to engraving styles, our online laser cutting software will recognize them, so you will only have to select the engraving option once (for instance to tell the software all green elements need to be light engraved).

You can upload your file without preset colors. Different engraving formats can be adjusted directly in online laser cutting software when you upload your file, but it can get confusing when it comes to complicated projects.
10. Laser cutting and engraving text
Laser cutting and engraving text is a very popular technique to enhance your project. However, there are a few important guidelines to consider. First of all, you have to assure that you turn the text into a path. Text cannot be read by the laser cutter, the machine needs a path to follow.
11. Discover living hinges
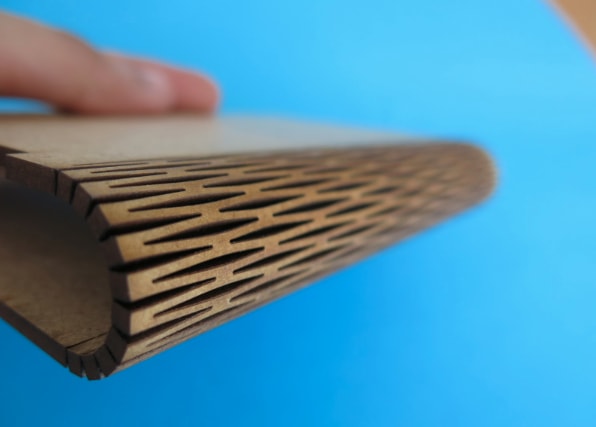
A living hinge is a mechanism that allows you to bend flat and rigid objects. It is a very interesting solution, letting you limit the number of parts needed to produce an object. Designing living hinges is pretty straight forward, you have to design a pattern of stripes without separating them. There are various patterns you can choose from, learn more about them.


 Connect with Google
 Connect with Facebook


